Beaded Chainmaille Jewelry Tutorial — Video 1
Beaded Chainmaille Tutorial Project
Beaded chainmaille jewelry tutorials are less common than standard chainmaille jewelry patterns, and I thought it was time that I did a video showing some patterns with beads. This is a project video, where we’ll make a bracelet. I also will show some other design options.
Oh, and why do I say “Video 1”? Naturally, I plan for more beaded chainmaille jewelry patterns!
Why Beaded Chainmaille?
Now I have a lot of different chainmaille bracelets — right now I’m wearing a roundmaille, a Turkish roundmaille and a Jens Pind. But up to this point I hadn’t done anything with beads, except as a dangle off an earring. Beaded chainmaille is a change of pace — and I am looking forward to making a bracelet incorporating sterling and pearls.
Supplies You’ll Need
All of the ring gauges list below are AWG. When I say 18 gauge, I mean a 1mm wire diameter.
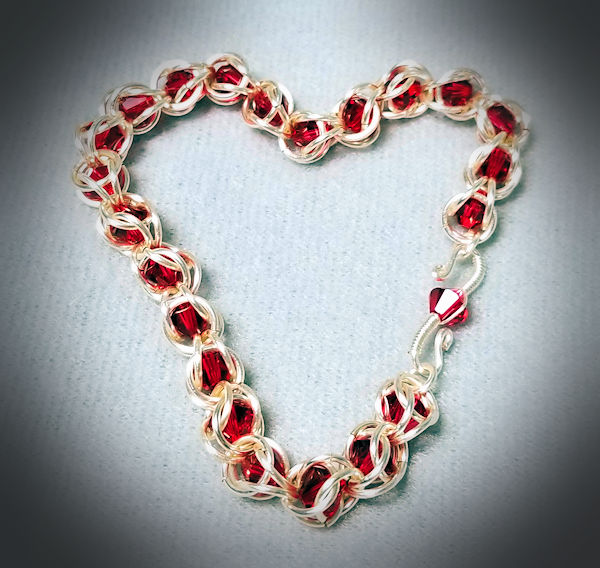
- 18 gauge 6mm inside diameter rings (AR = 6)
- 6mm bicone beads — I am using Swarovski, in the color Scarlet.
- 18 gauge 3.5mm or 4mm inside diameter (AR = 3.5 or 4)
- Clasp of your choice
You will need approximately 3 beads and 12 of the 6mm ID jump rings per inch of finished chain. As for the small jump rings, you will only need two or so, depending on what kind of clasp you plan to use. (In my case, I elected to make an “S” clasp that used one of the Swarovski bicones.)
If you want to make the green and gold bracelet, you’ll need more of the smaller jump rings and fewer of the large jump rings and bicone beads. And if you want to add a dangle or charm, you’ll need to include those.
Beaded Chainmaille Video Tutorial
Ready…set…let’s get maille-ing with this beaded chainmaille bracelet!
Flower Chain Video Tutorial
 This flower chain video tutorial shows you how easy chain maille can be. It’s something that is a little different from simply chaining jump rings together. Instead, the rings form little rosettes, which in turns gives the flower chain its name.
You don’t need a lot of different rings (unless of course you want to get more intricate). The demonstration you’ll see shows two different colors and sizes of jump rings, but you can do it all in one size and color if you like. The flower chain is very versatile!
Although I do mention AR in passing, this chain mail pattern can use a pretty wide range. Normally, I say anything over AR of 4 can be used
What You Will Need (Supplies)
You’ll need jump rings in 6mm inside diameter 18 gauge, and 5mm inside diameter 18 gauge rings for the bracelet.
You will also need a clasp of some sort; I have used an “S” clasp, but you can use whatever you wish.
There is also a set of earrings that you can make with this same weave; I show the photo and supplies after the video tutorial.
Earring Info and Supplies
 The earrings are made with the same basic flower chain pattern. Seeing as I prefer earrings to be as light as possible, I have made them with 20 gauge rings instead of 18 gauge. I have also only used three rings instead of four rings for each flower rosette.
Also, the AR of the rings I selected is only about 4.5, which is another reason I decided to use fewer rings in each flower. But, if you like, you can certainly use four rings per flower.
To make the earrings, you will need the following supplies:
- 1 pair of earring findings; I used gold-filled.
- Jump rings, Fuchsia, 20 gauge 4mm inside diameter
- Jump rings, Gold, 20 gauge 4mm inside diameter
- 2 gold-plated headpins
- 2 Swarovski bicone beads, 6mm, crystal AB2x
- 2 Swarovski bicone beads, 5mm, rose
- 2 Swarovski bicone beads, 4mm rose
Although I show five flowers per earring, you can make as many or as few as you like. If you don’t want to include the Swarovski beads or use different beads, that’s fine too — after all, these are your earrings! 🙂